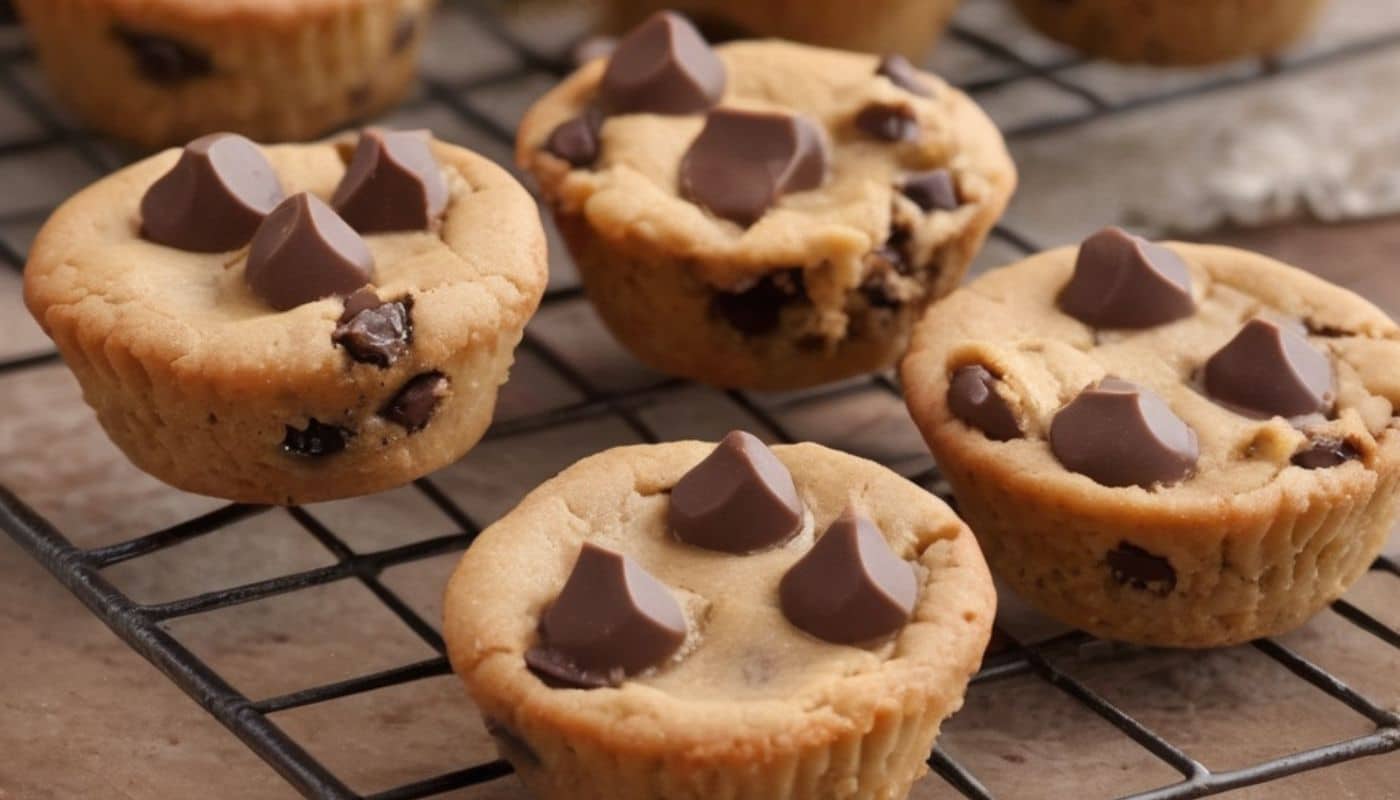
There’s something almost magical about the marriage of peanut butter and chocolate. It’s a culinary love story that’s stood the test of time.
As a professional pastry chef who’s spent nearly two decades perfecting desserts across three continents, I’ve yet to find a combination more universally adored than this dynamic duo. Cookie cups—those delightful, edible vessels—take this classic pairing to new heights of indulgence and presentation.
The Science Behind Perfect Peanut Butter Cookie Cups
The perfect peanut butter chocolate chip cookie cup isn’t just a happy accident. It’s a carefully calibrated creation that balances texture, structure, and flavor in perfect harmony. Let’s dive into what makes these treats work on a molecular level.
The Foundation: Understanding Fat Ratios
Peanut butter presents unique challenges in baking. With its fat content hovering between 45-60%, depending on variety, it behaves differently than butter. This natural fat affects the protein development in flour, ultimately impacting the structural integrity of our cookie cups.
I’ve ruined more batches than I’d like to admit by ignoring this simple fact. Commercial peanut butters typically contain 50-55% fat, which must be factored into your overall recipe calculations. Your total fat ratio (including butter) should ideally remain between 25-30% of the total recipe weight for optimal structure.
Natural peanut butters tend to seperate, creating inconsistent results. I always recomend using commercial creamy varieties for beginners, though natural versions can work with proper stabilization techniques.
Temperature Control: The Overlooked Variable
Most home bakers underestimate the importance of temperature in cookie cup creation. Room temperature ingredients aren’t just culinary dogma—they’re essential for proper emulsification and air incorporation.
Cold peanut butter won’t properly integrate with your sugars, leading to dense, greasy cups. Conversely, overly warm ingredients cause excessive spread, ruining that perfect cup shape we’re after. The sweet spot? 68-72°F (20-22°C) for all ingredients before mixing begins.
I once watched a culinary student struggle through three failed batches before I gently suggested checking her ingredient temperatures. The look on her face when the fourth batch emerged perfectly formed was worth every frustrating minute of trial and error.
Essential Equipment for Professional Results
While fancy equipment isn’t strictly necessary, certain tools elevate your cookie cup game from amateur to professional:
Muffin Tins: The Foundation
Standard muffin tins work wonderfully, but investing in heavy-gauge, non-stick versions pays dividends in even heating and easy release. Mini muffin tins create perfect two-bite treats, while standard tins offer more versatility for fillings and decorations.
Professional kitchens often use silicone molds for their flexibility and ease of unmolding. However, metal conducts heat more efficiently, creating better browning—that critical flavor development we crave in a well-made cookie.
I personally prefer aluminum tins with a slight non-stick coating. They provide the perfect balance of heat conductivity and practicality for high-volume production.
The Cookie Scoop: Precision Matters
Consistency separates professional results from homemade attempts. A proper cookie scoop (sometimes called a disher) ensures uniform portions, which leads to even baking and presentation.
For standard muffin tins, a #24 scoop (approximately 1.5 tablespoons) delivers ideal results. Mini cups require a #60 scoop (approximately 2 teaspoons). This precision allows you to calculate exact baking times across large batches.
I still remember the day I introduced cookie scoops to my first professional kitchen team. Production time decreased by 30%, and customer complaints about inconsistent sizing disappeared entirely.
The Master Formula: A Proportional Approach
Rather than providing a single recipe, I’ll share the proportional approach that allows for scaling and adaptation based on your specific needs.
Base Ratios for Success
The perfect peanut butter chocolate chip cookie cup follows these general proportions:
- 1 part peanut butter (by weight)
- 1 part butter or shortening (or combination)
- 1.5 parts combined sugars (granulated and brown)
- 0.5 parts eggs
- 2 parts flour
- 0.2 parts leavening agents
- 1 part chocolate chips
These proportions can be adjusted slightly based on your desired outcome. Increasing the peanut butter creates a more pronounced flavor but requires additional structure from the flour. Decreasing sugar improves structural integrity but sacrifices the characteristic chewiness.
I’ve experimented with these ratios extensivly, once baking 17 variations in a single weekend to determine the optimal balance. My spouse temporarily banned the words “cookie cup” from our home after that particular research session.
Specialty Ingredients Worth Considering
While basic ingredients produce excellent results, certain specialty additions can transform your cookie cups:
- European-style cultured butter: The higher fat content (82-84% versus standard 80%) and subtle tangy notes create complex flavor profiles that complement peanut butter beautifully.
- Specialty peanut butters: Small-batch artisanal varieties offer unique flavor profiles. Virginia peanuts provide a deeper, more aromatic quality than the standard Runner varieties used in commercial products.
- Fleur de sel: A light finishing sprinkle before baking enhances both chocolate and peanut flavors through contrast.
- Demerara sugar: Using this as part of your sugar component adds subtle caramel notes and improved texture.
I’ve found that Guittard or Valrhona chocolate discs produce superior melting characteristics compared to standard chips, though the price point makes them better suited for special occasions.
Critical Techniques for Professional-Level Results
Technique differentiates good cookie cups from extraordinary ones. These key methodologies separate professional results from amateur attempts:
The Optimal Mixing Method
The creaming method reigns supreme for cookie cups. However, the typical approach requires modification for peanut butter incorporation:
- Cream butter alone until light and fluffy (approximately 3 minutes at medium speed).
- Add peanut butter and cream for an additional 2 minutes.
- Incorporate sugars gradually, beating 4-5 minutes until the mixture lightens significantly.
- Add eggs one at a time, fully incorporating each before adding the next.
- Mix dry ingredients separately, then fold in gently until just combined.
- Fold in chocolate chips by hand to prevent overworking the dough.
I’ve sadly watched countless bakers dump all ingredients in simultaneously, robbing their creations of the aeration that creates the perfect texture. Patience in mixing pays tremendous dividends in the final product.
The Shaping Secret
Creating the perfect cup shape requires more than simply pressing dough into tins. The professional approach:
- Chill dough for at least 30 minutes (ideally 2 hours) before shaping.
- Use a cookie scoop for precise portions.
- Place portioned dough into each cup without pressing.
- Freeze for 10 minutes before making indentations.
- Use a floured shot glass or specialized tool to press centers, creating even walls.
This methodical approach prevents the dough from sticking to your shaping tools and ensures structural integrity during baking.
I learned this particular techniqe from a veteran pastry chef in Barcelona who specialized in petit fours. His attention to detail transformed my understanding of miniature baked goods forever.
Temperature Management Through the Process
Professional bakers obsess over temperature control for good reason. It’s essential for consistent, reproducible results:
Critical Temperature Points
- Dough resting: 35-40°F (1.5-4.5°C) for 2-24 hours
- Shaped dough before pressing: 10 minutes in freezer (approximately 10°F/-12°C)
- Oven preheating: Minimum 20 minutes at 350°F (177°C)
- Internal temperature at completion: 175°F (79°C)
I always recommend using an oven thermometer to verify temperatures, as many ovens can be miscalibrated by 25°F or more. This small investment prevents countless baking failures.
Modern convection ovens require temperature reduction by approximately 25°F (14°C) to account for increased heat circulation. Ignoring this adjustment leads to overdone exteriors with underbaked centers—the nemesis of perfect cookie cups.
Troubleshooting Common Issues
Even experienced professionals encounter challenges. Here’s how to address the most common problems:
Excessive Spreading
When cookie cups spread excessively, losing their defined shape:
- Increase flour by 2-3 tablespoons per batch
- Reduce sugar by 1-2 tablespoons
- Ensure adequate chilling before baking
- Check oven temperature accuracy
- Consider reducing leavening agents slightly
I once rescued an important catering order by quickly reformulating a spreading batch with additional flour and a brief freezing period. The client never knew how close we came to disaster!
Cracking During Baking
Those frustrating cracks that sometimes develop during baking can be addressed by:
- Increasing fat content slightly (1-2 tablespoons extra peanut butter)
- Ensuring even wall thickness during shaping
- Adding 1 tablespoon cornstarch to the flour mixture
- Reducing baking temperature by 25°F
Cracking often results from excessive protein development or uneven moisture distribution. Gentle handling of the dough prevents both issues.
Creative Variations for Professional Menus
Beyond the classic formula, these variations have proven successful in professional settings:
Flavor Infusions
- Coffee-infused: Add 1 tablespoon espresso powder to dry ingredients for depth
- Orange-accented: Incorporate 1 tablespoon orange zest for brightness
- Maple enhancement: Replace 25% of sugar with pure maple sugar
- Spiced version: Add 1 teaspoon cinnamon and ¼ teaspoon cayenne for complexity
I’ve found the spiced version particularly popular during fall and winter months, while the orange variation shines during spring and summer service.
Structural Variations
- Cookie cup sandwiches: Create thinner cups and sandwich with ganache or buttercream
- Filled cups: Partially bake, create deeper indentation, then fill with ganache, caramel, or jam before completing baking
- Layered cups: Create distinct layers of different cookie doughs within one cup
The layered approach created my most photographed dessert during my tenure at a prominent New York restaurant. The visual impact was undeniable, though the technique requires significant practice.
Professional Presentation Techniques
Elevate your cookie cups from simple treats to showcase items:
Garnishing Approaches
- Tempered chocolate decorations: Create simple curved chocolate pieces for dramatic height
- Gold leaf application: A tiny touch of edible gold creates luxury perception
- Candied peanut clusters: Provides textural contrast and visual interest
- Micro herb garnish: A single leaf of chocolate mint adds aromatic dimension
The difference between amateur and professional presentation often comes down to restraint. One perfect garnish element exceeds the impact of multiple competing decorations.
Plating for Service
When serving in professional contexts:
- Warm cookie cups slightly (10 seconds in microwave or 2 minutes in 250°F oven)
- Pair with contrasting temperature elements (warm cup with cold ice cream)
- Consider sauce placement for color contrast and flavor enhancement
- Use negative space effectively—don’t overcrowd the plate
I once watched a talented chef transform the same cookie cup from ordinary to extraordinary simply through thoughtful plating decisions. The dessert instantly became our most ordered menu item.
The Business Case for Cookie Cups

For professional establishments, cookie cups offer compelling advantages:
Cost Efficiency
With ingredients costing approximately $0.30-0.45 per cup (depending on quality and location), and typical menu pricing between $2.50-6.00, the profit margin exceeds many traditional desserts.
Moreover, the extended shelf life (3-4 days when properly stored) reduces waste compared to more perishable options.
I implemented cookie cups as a strategic menu item at a struggling café, increasing dessert sales by 42% while reducing labor costs associated with more complex offerings.
Production Efficiency
These treats can be produced in large batches and frozen before baking (up to 3 months). This advance preparation smooths production schedules during busy periods.
A well-trained team can produce 400-500 cookie cups in a standard 8-hour shift, creating inventory for multiple service days.
Conclusion: The Timeless Appeal of Cookie Cup Perfection
Peanut butter chocolate chip cookie cups represent that rare intersection of crowd-pleasing flavor, production efficiency, and presentation versatility. Whether serving casual customers or discerning gourmands, these treats deliver consistent satisfaction.
The technical understanding presented here transforms a simple concept into a showcase of culinary mastery. By respecting the science, embracing proper technique, and allowing for creative interpretation, professional bakers can elevate this humble dessert to unexpected heights.
I’ve witnessed firsthand how these principles transform good bakers into great ones. The attention to detail—from ingredient temperature to garnish placement—separates memorable desserts from forgettable ones.
As with all culinary pursuits, mastery comes through practice and observation. Begin with these foundational concepts, then develop your unique approach as experience guides you. Your perfect peanut butter chocolate chip cookie cup awaits.

Emily Rose Johnson is a talented writer known for her captivating storytelling and evocative prose, creating unforgettable characters and compelling narratives in various genres.