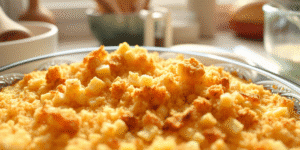
Jam drops, also known as thumbprint cookies, are a classic treat that evoke nostalgia for many. These delightful cookies blend a tender, buttery base with a sweet jam center, creating a perfect harmony of textures and flavors.
In this article, we will explore the origins, techniques, and nuances of making jam drops that stand out in both taste and presentation. Whether you’re a seasoned baker or just starting out, this guide will empower you to create cookies that impress.
The purpose of this article is to provide bakers with a comprehensive understanding of jam drops. We’ll dive into the history, recipe variations, and expert tips. By the end, you’ll be equipped with everything you need to master this beloved cookie.
The History Behind Jam Drops
Jam drops have a rich history that stretches back generations. While their precise origins are unclear, many believe they originated in Europe. The concept of filling cookies with jam is not unique to any one culture. Instead, variations can be found in many cuisines. The simplicity of jam drops makes them a favorite for home bakers and professional pastry chefs alike.
Traditionally, these cookies were made with whatever jam was on hand. This adaptability made them a staple in many households. Over time, different regions have put their own spin on the recipe, using local ingredients and flavors. This evolution has led to endless possibilities for bakers today.
Understanding the Ingredients
To create the perfect jam drop, you need to understand the role of each ingredient. The basic components include flour, butter, sugar, eggs, and, of course, jam. Let’s break down these ingredients.
Flour
All-purpose flour is the backbone of the cookie. It provides structure and stability. Some bakers prefer to use cake flour for a lighter texture. The choice depends on the desired outcome. Experimenting with different flours can yield exciting results.
Butter
Butter is crucial for flavor and texture. Use unsalted butter for control over salt levels. Room temperature butter is key for creaming with sugar. This process incorporates air, leading to a light, tender cookie. Don’t skip this step; it’s vital for success.
Sugar
Granulated sugar is common, but consider brown sugar for a deeper flavor. The molasses in brown sugar adds moisture and richness. Adjusting the type of sugar can subtly change the cookie’s character.
Eggs
Eggs add moisture and act as a binding agent. They also help with leavening. For a richer flavor, try using an extra yolk. This small change can make a big difference in the final product.
Jam
The star of the show! The type of jam you choose can elevate your cookies. Classic choices include raspberry, apricot, and strawberry. But don’t limit yourself; try unique flavors like fig or citrus. Homemade jam can also enhance the quality of your cookies.
Mastering the Technique
Baking jam drops isn’t just about following a recipe; it’s about understanding technique. Here’s how to ensure your cookies turn out perfectly every time.
Creaming the Butter and Sugar
Start by creaming the butter and sugar together until light and fluffy. This process typically takes about 3-5 minutes. Be patient; the texture is important. If you rush this step, your cookies may end up dense.
Adding the Eggs
Add the eggs one at a time, mixing well after each addition. This ensures even incorporation. Scrape down the sides of the bowl to make sure everything is combined. It’s a small step, but it can prevent lumps.
Incorporating the Dry Ingredients
When adding flour, do so gradually. Mix until just combined; overmixing can lead to tough cookies. You want a soft, pliable dough that’s not sticky. If it feels too wet, a little extra flour can help.
Shaping the Cookies
Once your dough is ready, it’s time to shape the cookies. Roll them into balls about an inch in diameter. Place them on a lined baking sheet, leaving space between each one. This allows for spreading during baking.
Creating the Thumbprint
Here’s where the “thumbprint” comes in. Using your thumb or the back of a spoon, make an indent in each cookie ball. Don’t press too hard; you just want a small well for the jam. This is essential for holding the filling.
Filling with Jam
Fill each thumbprint with a teaspoon of jam. Be careful not to overfill; jam can bubble over while baking. A little goes a long way, and you want to maintain the cookie’s shape.
Baking
Bake your cookies in a preheated oven at 350°F (175°C) for about 12-15 minutes. Keep an eye on them; every oven is different. You want the edges to be lightly golden. Let them cool on the baking sheet for a few minutes before transferring to a wire rack.
Common Mistakes to Avoid
Even experienced bakers can make mistakes. Here are some common pitfalls and how to avoid them.
Overmixing
As mentioned, overmixing can lead to tough cookies. Mix just until combined. If you see flour streaks, that’s okay; they’ll incorporate during baking.
Incorrect Oven Temperature
Always preheat your oven. An oven that’s too hot can burn the cookies before they’re fully cooked. Use an oven thermometer if you’re unsure.
Skipping the Cooling Period
Letting cookies cool on the baking sheet for a few minutes allows them to set. If you move them too soon, they may break apart.
Flavor Variations and Add-Ins
One of the best things about jam drops is their versatility. Here are some ideas to switch things up.
Nutty Additions
Incorporating chopped nuts can add texture and flavor. Walnuts, almonds, or hazelnuts work well. Just fold them into the dough before shaping.
Citrus Zest
Adding lemon or orange zest can brighten the flavor profile. A teaspoon of zest can make a noticeable difference. It’ll cut through the sweetness and add freshness.
Spices
Consider adding spices like cinnamon or nutmeg for warmth. Just a pinch can enhance the overall experience. Experimenting with spices can lead to delightful surprises.
Storage and Shelf Life
Proper storage is crucial for maintaining the freshness of your jam drops. Allow the cookies to cool completely before storing. Use an airtight container to keep them soft. They’ll last for about a week at room temperature. For longer storage, consider freezing them. Just layer them between parchment paper and place them in a freezer-safe container. They can be frozen for up to three months.
Conclusion
Jam drops are more than just cookies; they’re a canvas for creativity. By mastering the basics and experimenting with flavors, you can create a batch that’s uniquely yours. Remember to pay attention to your techniques and ingredients. With practice, you’ll be able to make jam drops that not only taste great but also look stunning.
So, gather your ingredients and get baking. Whether you stick to tradition or venture into new territory, these cookies are sure to delight. Happy baking!

Emily Rose Johnson is a talented writer known for her captivating storytelling and evocative prose, creating unforgettable characters and compelling narratives in various genres.