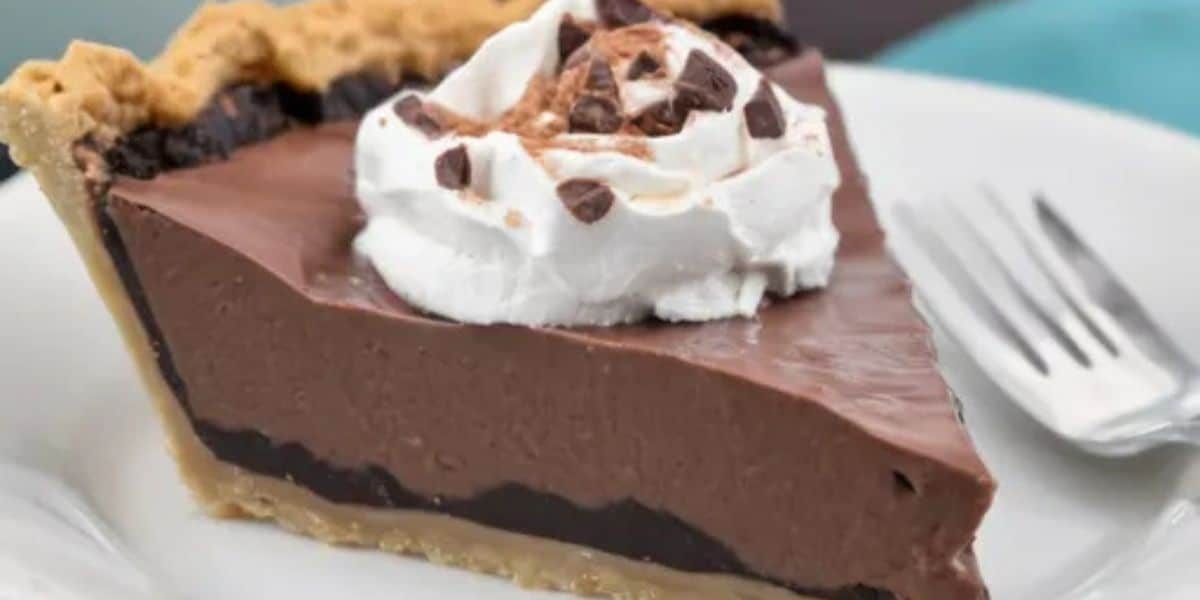
Craving a slice of chocolate heaven without turning on the oven? Well, you’ve come to the right place, mate! This article dives deep into the luscious world of no-bake chocolate pudding pie.
We’ll explore the secrets to achieving that perfect creamy texture and rich chocolate flavor. Get ready to impress your friends and family with this easy-to-make dessert masterpiece.
Why No-Bake? The Genius of Simplicity
Let’s be honest, baking can be a real pain sometimes. This no-bake recipe offers a delightful shortcut without sacrificing flavor or texture. It’s perfect for those hot summer days when you don’t want to heat up the kitchen. Plus, it’s a fantastic option for beginner bakers who want to create something impressive without the complexities of traditional baking.
The Foundation: Crust Considerations
The crust is the unsung hero of any pie. For a no-bake chocolate pudding pie, a pre-made graham cracker crust is the classic choice. But don’t let that limit you! You can also use chocolate wafers, Oreo cookies (with or without the cream filling), or even a homemade crust made from crushed nuts and dates.
Graham Cracker Crust: The Reliable Favorite
A store-bought graham cracker crust is convenient and readily available. Make sure to check the expiration date to ensure freshness. For a more intense graham cracker flavor, you can lightly toast the crust in a toaster oven for a few minutes. Just keep a close eye on it to prevent burning.
Oreo Crust: A Chocolate Lover’s Dream
Using Oreo cookies for the crust adds an extra layer of chocolatey goodness. Simply crush the cookies (with or without the cream filling) in a food processor or by hand. Mix with melted butter and press into a pie plate. Chill for at least 30 minutes to set.
Homemade Nut and Date Crust: A Healthier Twist
For a healthier and more flavorful option, consider making a crust from crushed nuts and dates. Combine your favorite nuts (like almonds, walnuts, or pecans) with pitted dates in a food processor. Process until finely ground and press into a pie plate. This crust is naturally sweet and adds a delightful nutty flavor.
The Heart of the Pie: Chocolate Pudding Perfection
The chocolate pudding is where the magic happens. You can use store-bought instant pudding mix for convenience. However, for a truly decadent experience, I highly recommend making your own chocolate pudding from scratch.
Instant Pudding: Quick and Easy
Using instant pudding mix is the easiest option. Just whisk the mix with cold milk according to the package directions. Let it set for a few minutes until thickened. For a richer flavor, use whole milk or add a splash of heavy cream.
Homemade Pudding: The Ultimate Indulgence
Making chocolate pudding from scratch may seem intimidating, but it’s actually quite simple. It all starts with combining sugar, cornstarch, and cocoa powder in a saucepan. Whisk in milk and cook over medium heat, stirring constantly, until thickened. Remove from heat and stir in butter and vanilla extract for added richness and flavor.
Choosing Your Chocolate
The type of cocoa powder you use will significantly impact the flavor of your pudding. Dutch-processed cocoa powder will give you a smoother, less acidic flavor. Natural cocoa powder will have a more intense chocolate flavor. Experiment with different types to find your personal preference.
Achieving the Perfect Texture
The key to a smooth and creamy pudding is constant stirring. This prevents lumps from forming and ensures that the cornstarch is evenly distributed. If you do end up with lumps, you can strain the pudding through a fine-mesh sieve.
Assembling the Masterpiece
Once you have your crust and pudding ready, it’s time to assemble the pie. Pour the chocolate pudding into the prepared crust. Spread it evenly with a spatula. Cover the pie with plastic wrap, pressing it directly onto the surface of the pudding to prevent a skin from forming. Chill in the refrigerator for at least 4 hours, or preferably overnight, to allow the pudding to set completely.
Toppings: The Crowning Glory
No pie is complete without a generous topping. Whipped cream is the classic choice, but you can also use chocolate shavings, fresh berries, chopped nuts, or a drizzle of chocolate sauce.
Whipped Cream: Light and Airy
Homemade whipped cream is always the best option. Simply whip heavy cream with sugar and vanilla extract until stiff peaks form. For a stabilized whipped cream that will hold its shape for longer, add a small amount of powdered sugar or cornstarch.
Chocolate Shavings: Elegant and Decadent
Chocolate shavings add a touch of elegance to your pie. Use a vegetable peeler or a sharp knife to shave chocolate from a block of dark chocolate. For best results, chill the chocolate in the refrigerator for a few minutes before shaving.
Fresh Berries: A Burst of Freshness
Fresh berries add a pop of color and a burst of freshness to your pie. Strawberries, raspberries, and blueberries are all excellent choices. Arrange the berries artfully on top of the whipped cream for a visually stunning presentation.
Chopped Nuts: A Crunchy Contrast
Chopped nuts add a delightful crunchy contrast to the smooth and creamy pudding. Toasted almonds, walnuts, or pecans are all great options. Sprinkle the nuts evenly over the whipped cream or arrange them in a decorative pattern.
Variations and Twists: Unleash Your Creativity
The basic no-bake chocolate pudding pie recipe is a blank canvas for your culinary creativity. Here are a few ideas to get you started:
Peanut Butter Chocolate Pie
Swirl peanut butter into the chocolate pudding for a delicious peanut butter chocolate combination. You can also add a layer of peanut butter cups to the bottom of the crust.
Mint Chocolate Pie
Add a few drops of peppermint extract to the chocolate pudding for a refreshing mint chocolate flavor. Top with crushed peppermint candies for an extra festive touch.
Salted Caramel Chocolate Pie
Drizzle salted caramel sauce over the chocolate pudding for a sweet and salty treat. You can also add a layer of salted caramel to the bottom of the crust.
Mocha Chocolate Pie
Add instant coffee powder to the chocolate pudding for a rich mocha flavor. Top with chocolate-covered espresso beans for an extra caffeine kick.
Serving and Storage: The Final Touches
Serve your no-bake chocolate pudding pie chilled. It’s best enjoyed within 2-3 days of making it. Store any leftovers in the refrigerator, covered with plastic wrap.
Common Mistakes and How to Avoid Them
Even with a simple recipe like this, there are a few common mistakes to watch out for.
Soggy Crust
A soggy crust is the enemy of any pie. To prevent this, make sure to chill the crust thoroughly before adding the pudding. You can also brush the bottom of the crust with melted chocolate to create a moisture barrier.
Lumpy Pudding
Lumpy pudding is usually caused by improper mixing or cooking. Make sure to whisk the ingredients thoroughly before cooking and stir constantly while cooking. If you do end up with lumps, strain the pudding through a fine-mesh sieve.
Skin on Pudding
A skin can form on the surface of the pudding if it’s exposed to air. To prevent this, cover the pie with plastic wrap, pressing it directly onto the surface of the pudding.
Expert Tips for the Perfect Pie
Here are a few expert tips to help you create the perfect no-bake chocolate pudding pie:
- Use high-quality chocolate for the best flavor.
- Chill the pie for at least 4 hours, or preferably overnight, to allow the pudding to set completely.
- Don’t overfill the crust, or the pudding will spill over the sides.
- Get creative with your toppings to personalize your pie.
The Science of No-Bake Pudding
Ever wondered what makes a no-bake pudding set without the need for an oven? The secret lies in the starch! Cornstarch, a common ingredient, acts as a thickening agent. When mixed with liquid and heated (even without baking), the starch granules absorb the liquid and swell, creating a viscous, gel-like structure. This process, called gelatinization, is what gives pudding its characteristic creamy texture.
No-Bake vs. Baked: A Nutritional Comparison
While both no-bake and baked pies offer a sweet treat, there are slight nutritional differences. No-bake pies often rely on pre-made crusts and instant pudding mixes, which can be higher in processed ingredients and added sugars. On the other hand, homemade baked pies allow for more control over ingredients, potentially offering a healthier option with whole grains and natural sweeteners.
Emerging Trends in No-Bake Desserts
The world of no-bake desserts is constantly evolving. Here are a few emerging trends to watch out for:
- Vegan and Gluten-Free Options: More and more recipes are catering to dietary restrictions with vegan and gluten-free crusts and pudding fillings.
- Exotic Flavors: Experimenting with unique flavors like matcha, lavender, and cardamom is gaining popularity.
- Individual Desserts: Mini no-bake pies and parfaits are perfect for portion control and elegant presentation.
Conclusion: Your No-Bake Chocolate Pudding Pie Adventure Begins
So, there you have it – the ultimate guide to creating a no-bake chocolate pudding pie that will impress everyone. With its ease of preparation and customizable options, this dessert is perfect for any occasion. So, get into the kitchen and start experimenting with different crusts, puddings, and toppings. Your chocolatey adventure awaits!

Emily Rose Johnson is a talented writer known for her captivating storytelling and evocative prose, creating unforgettable characters and compelling narratives in various genres.


