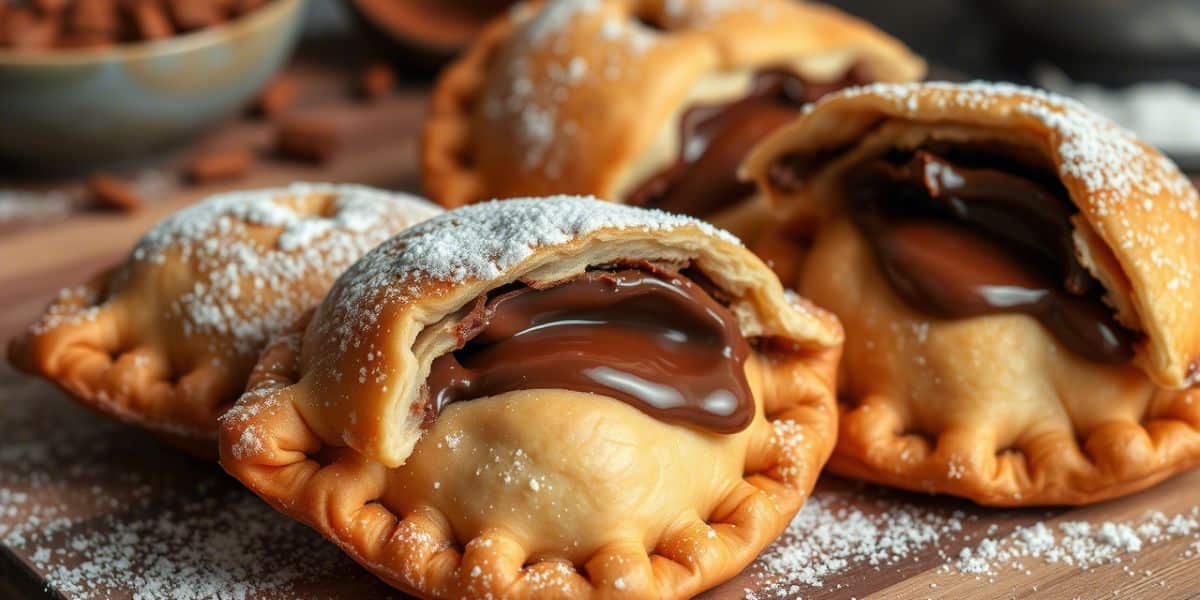
There’s something wildly unfair about chocolate hand pies. They’re too good. Too small to stop at one. Too simple to feel gourmet—until you taste ’em. That’s when the game changes. These buttery, chocolate-stuffed pockets of joy are edging their way into the dessert hall of fame, one bite at a time.
This isn’t your average Pinterest-baked, Instagram-filtered sugar bomb. No. We’re talking crisp, flaky pastry wrapped around deeply rich chocolate. It’s got layers—literal and metaphorical. Today, we’re digging deep into the what, the why, and the how-the-heck-do-I-make-that of chocolate hand pies. Bakers, pastry chefs, and dessert rebels—this one’s for you.
What Exactly Are Chocolate Hand Pies?
You could call them turnovers. Or mini-pies. Or, if you’re feeling romantic, chocolate love letters baked in golden envelopes. Technically, hand pies are single-serving pastry pockets filled with sweet or savory fillings. But in this case, we’re skipping the veggies and diving straight into sin. Think: molten dark chocolate, gooey Nutella, or even ganache if you’re feeling real fancy.
They’re baked, not fried. Portable, not fussy. Kid-approved and adult-devoured. The crust? Usually a shortcrust or puff pastry. You want it flaky, tender, and golden, not chewy or underbaked. No soggy bottoms allowed.
Here’s the kicker though—done right, chocolate hand pies can rival a proper plated dessert.
Why Chocolate Hand Pies Are a Professional Baker’s Secret Weapon
In a commercial kitchen, hand pies punch way above their weight. You can batch-prep ’em. Freeze ’em. Bake to order. Serve hot, cold, or mid-thaw (no judgment). For bakeries, they’re a goldmine. Low cost, high markup, zero customer remorse. That’s the trifecta.
From a technical angle, they’re a brilliant way to showcase your pastry skills in miniature. Lamination? Sure. Blind baking? Optional. Tempered fillings? If you dare. There’s just enough complexity to flex, without becoming a pastry bootcamp.
Also—let’s be honest—chocolate sells. It always has. A 2023 report from IBISWorld noted that chocolate-based baked goods make up nearly 60% of dessert-based impulse purchases in cafes and boutique bakeries. That’s not just a craving. That’s data-backed sugar economics.
The Pastry: Flaky, Not Fragile
Your crust is where the magic begins—or completely falls apart.
If you’re going with puff pastry (store-bought or scratch), make sure it’s cold but pliable. Too warm and your layers fuse. Too cold and it cracks like bad news. For a shortcrust, aim for 3:2:1—flour, fat, liquid. Ice water, not just cold. Salted butter, not margarine (please, don’t do that to yourself).
Advanced trick? Add a tablespoon of sour cream or cream cheese to your dough. It makes it tender and just tangy enough to cut through the sweetness. Pros do it. Grandma probably did too.
Chill your dough. Twice. Once after mixing. Again after rolling. Lazy dough equals sad pie.
The Filling: Go Bold or Go Back
You’ve got options, but not that many. Keep it rich, keep it thick, and make sure it holds its shape when cool but melts in the oven. That means skip runny sauces or overly soft centers. They’ll just burst out mid-bake and ruin your vibes.
Professional Filling Combos That Actually Work:
- Bittersweet chocolate + orange zest + a touch of sea salt
- Nutella + roasted hazelnuts
- Dark chocolate ganache with espresso dust
- Milk chocolate + banana mash (with a whisper of cinnamon)
- Spicy Mexican chocolate + a pinch of cayenne
You want depth, not just sweetness. Add texture—nuts, crumbs, even a cookie butter swirl. Make it craveable. Not just chocolaty.
Oh, and please—no chocolate chips straight from the bag. They’re made to hold shape, not melt. Use baking wafers or chopped couverture.
Assembly: Precision Over Perfection
Cut your dough into circles, squares, or hearts if you’re into seasonal drama. Aim for 4–5 inches wide. Anything bigger becomes a calzone. Anything smaller is… an insult.
Scoop a modest amount of filling—roughly a tablespoon. Don’t be greedy. Seal with a fork or crimp with your fingers like you mean it. A little egg wash acts like pastry glue. Use it. Don’t trust air pockets. Pierce the tops for steam to escape.
And for the love of lamination—chill ’em again before baking. Cold pies hit hot ovens like champs. Room-temp pies slump like missed deadlines.
Baking Time: Hot and Fast
Preheat your oven to 400°F (205°C). That’s the sweet spot for a blast of heat that crisps the crust before the filling turns into lava. Bake for 18–22 minutes. You want golden, not brown. Flaky, not dry. Use parchment to catch any overflow—it’ll happen. Embrace the mess.
Brush with egg wash before baking for shine. Or melted butter after baking for that rustic, soft glow. Dust with powdered sugar. Drizzle with chocolate. Or just leave ’em naked. They can handle it.
Storage, Shelf Life & Freezer Game
Fresh is best. Obviously. But real kitchens plan ahead.
Store cooled pies in an airtight container for up to 3 days. Reheat in a toaster oven to bring back the crisp. Microwave at your own risk—sog town, population: you.
For freezing, assemble and freeze unbaked pies on a sheet tray. Once solid, transfer to bags or containers. Label with date and filling type. Bake from frozen—just tack on an extra 4–5 minutes.
A note for catering gigs or cafes: offer two sizes. Regular (hand-sized) and mini (two-bite). Smaller ones sell better in bulk. And people order more than one, because… well, psychology.
Common Mistakes That’ll Break Your Pie-Loving Heart
Overfilling. Always. Every time. You think you’re doing a nice thing—then boom. Chocolate eruption.
Underbaking. A pale crust is a crust that didn’t reach its potential. Give it time. Watch the edges.
Wrong chocolate. Cheap chocolate tastes like waxy regret. You want 60–70% cocoa. Maybe 55% if you’re pairing with sweet dough.
Leaky seams. Crimp like you’re sealing a secret. Not a suggestion.
Skipping chill time. Cold dough equals flaky layers. This is non-negotiable, friend.
Trends & Twists from Real Kitchens
In 2024, artisan bakeries in Brooklyn and Portland started stuffing hand pies with… savory-sweet combos. Think dark chocolate + chili oil. Or blue cheese + milk chocolate (don’t knock it till you’ve had it).
Vegan versions are on the rise too. Coconut oil crusts. Cashew cream fillings. There’s even an oat milk ganache floating around, if you’re into that plant-based wizardry.
And yes—air fryer recipes exist. They’re decent. Not amazing. But decent.
Expert Insights From the Pastry Trenches
Chef Alina Romero, who runs a dessert lab in San Diego, swears by overnight dough rest:
“Let it sit. Dough needs to relax. You’ll get cleaner layers and better structure. Patience makes flaky pies.”
Ben Truitt, pastry R&D for a major hotel group, pushes contrast:
“Don’t be afraid of bitter. Sweet-on-sweet is boring. Add espresso, salt, crunch. That’s what people remember.”
Lena Cho, bakery consultant:
“They’re perfect for up-selling. Pair with a mini espresso or craft milk. People love ‘sets’—it feels premium.”
Final Takeaway: Why You Need Chocolate Hand Pies In Your Life (and Your Menu)
They’re deceptively simple. Deeply satisfying. Easy to batch, hard to mess up (unless you’re reckless with chocolate chips).
Hand pies hit that nostalgic, comforting note, while giving pros a chance to innovate. They’re rustic. Elegant. Profitable. And—when done with intention—they’re just stupidly good.
Whether you’re a bakery looking for your next signature item, or a home baker on a mission, chocolate hand pies are the underrated, overachieving dessert we should all be talking about more.
Go make one. Or twenty. You’ve got no excuse now.

Emily Rose Johnson is a talented writer known for her captivating storytelling and evocative prose, creating unforgettable characters and compelling narratives in various genres.